look for a unique plus to your garden ?
Making your own concrete mushrooms is an easy weekend task that adds a personal touch to your outside space .
With introductory tools and a bit of creativity , you could make these charming garden decorations .
The step are simple , ascertain it out :
An easy weekend labor my Dad loves so I ’m sharing again . This time you should sew this video with your mushroom so I can show Grandpa Einar . Love , Dad
♬ original strait - DadAdviceFromBo

Step-by-Step Guide
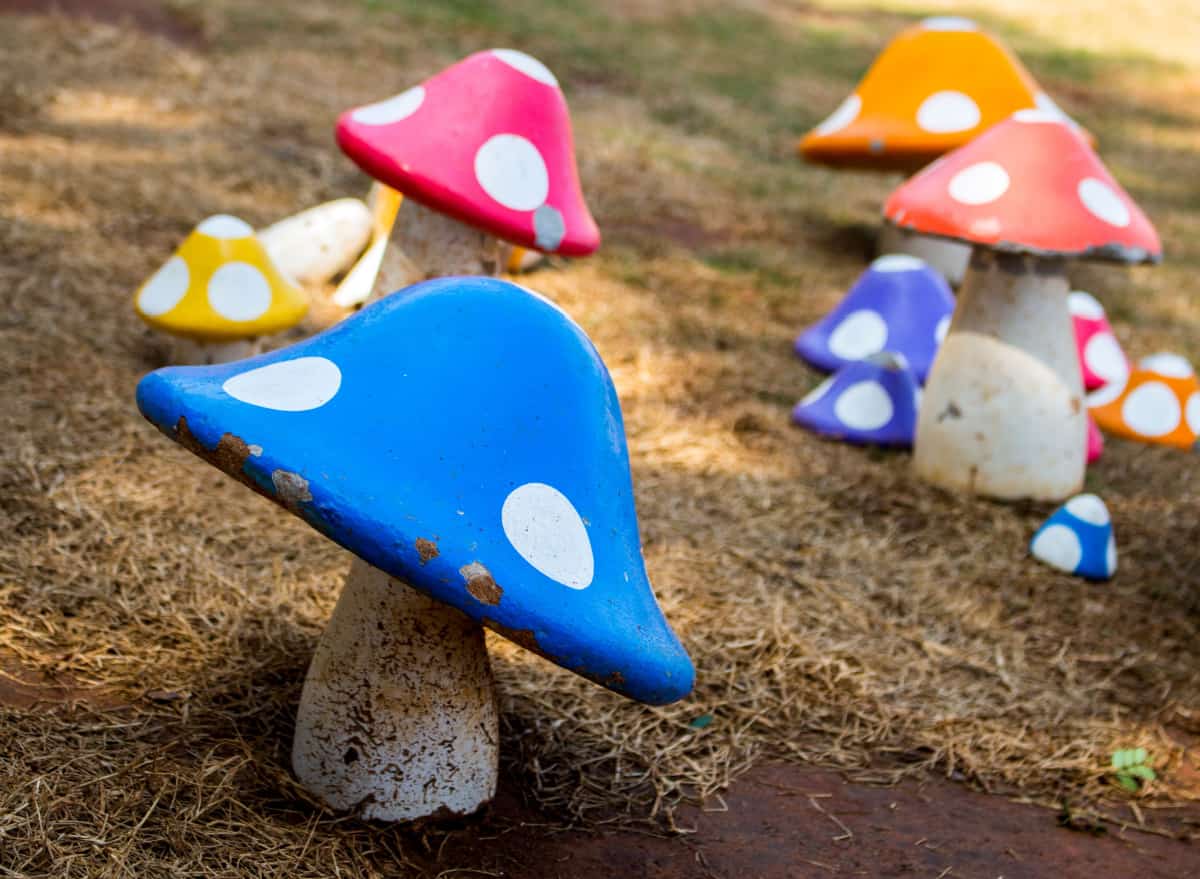
This DIY task , inspired by a TikTok picture fromdadadvicefrombo , is not only a not bad way to personalize your outside space , but it ’s also a fantastic activity to lock kids or grandkids in .
Here ’s an blow up footfall - by - step guide on make these charming garden decorations over a weekend .
1. Prepare the Mold
Start by taking some dirt or Baroness Dudevant and make an indention in it . This will serve as the mold for your mushroom cap .
The size and astuteness of the indent will limit the size of your mushroom cap , so feel spare to experiment .
track the indentation with plastic wrap to make a roadblock between the concrete and the grunge or sand , ensuring easy removal of the harden concrete .

2. Pour the Concrete
Next , pour your mixed concrete into the plastic - covered indent .
Click here to see this concrete on Amazon .
verify to drop out the bottom to give your mushroom jacket a nice , even contour . This will also check that your mushroom crown sit well on the stem .

Click here to see this kit of various - size screws on Amazon .
Before the concrete hardens , insert a piece of ass into it . This will be used subsequently to attach the mushroom cap to its stem , cater constancy to your garden ornament .
3. Let it Harden
allow for the concrete to indurate . This process can take a few hours to a full day , look on the size of it of your mushroom chapiter and the case of concrete used .
Once it ’s lay out , you ’ll have the top of your mushroom ready to go .
The waiting period is a great metre to plan the next steps or train for the decoration phase .

4. Get Creative
The lulu of this project is that every mushroom can total in unlike shapes , size , and colours .
apply your creativity to get along up with various designs .
you’re able to even paint the hardened concrete caps to add more color and character to your mushroom .

Consider using weather - resistant blusher to ensure your creations can defy the elements .
Click here to see this atmospheric condition - resistant paint on Amazon .
5. Prepare the Stems
While your mushroom-shaped cloud caps are drying , it ’s time to prepare the stems . Find some slurred sticks from your yard to apply as the stems .
The duration and heaviness of the sticks can vary depend on your preference .
Drill a trap into the bottom of each peg . This hole should be big enough to accommodate the fucking in your mushroom chapiter .

6. Assemble the Mushrooms
Now it ’s time to institute your mushrooms to aliveness . beat the drilled sticks into the terra firma where you want your mushrooms to be .
The location can be anywhere in your garden , perhaps near a garden path or around a tree .
retrieve the nooky in your mushroom-shaped cloud hood ? It should slew right into the hole you drilled in the joystick , securing the cap to the stalk .
DIY Project Wrap-Up
And there you have it ! With a fleck of creativity and a few simple steps , you ’ve transformed your garden with these charming concrete mushroom cloud .
Remember , this task is all about personalization and fun . So , do n’t waffle to try out with different configuration , size , and colors .
Enjoy your crafting journey and the whimsical touch these mushroom convey to your garden .
Read more DIY garden decors we have below :
How To Use Diapers In hang Baskets
The Pool Noodle Hack That Will Save You Money On Potting Soil
