Irises are among the most keen cultivated efflorescence . Planning to organise them for the next season of planting ? Then , con how to divide and store this flora is necessary . We ’ve researched this matter and gathered idea for these two processes . You ’ll be glad to have sex that it is well-to-do to do .
To divide and stock iris rhizomes for the next planting time of year , the step are :
Dividing :
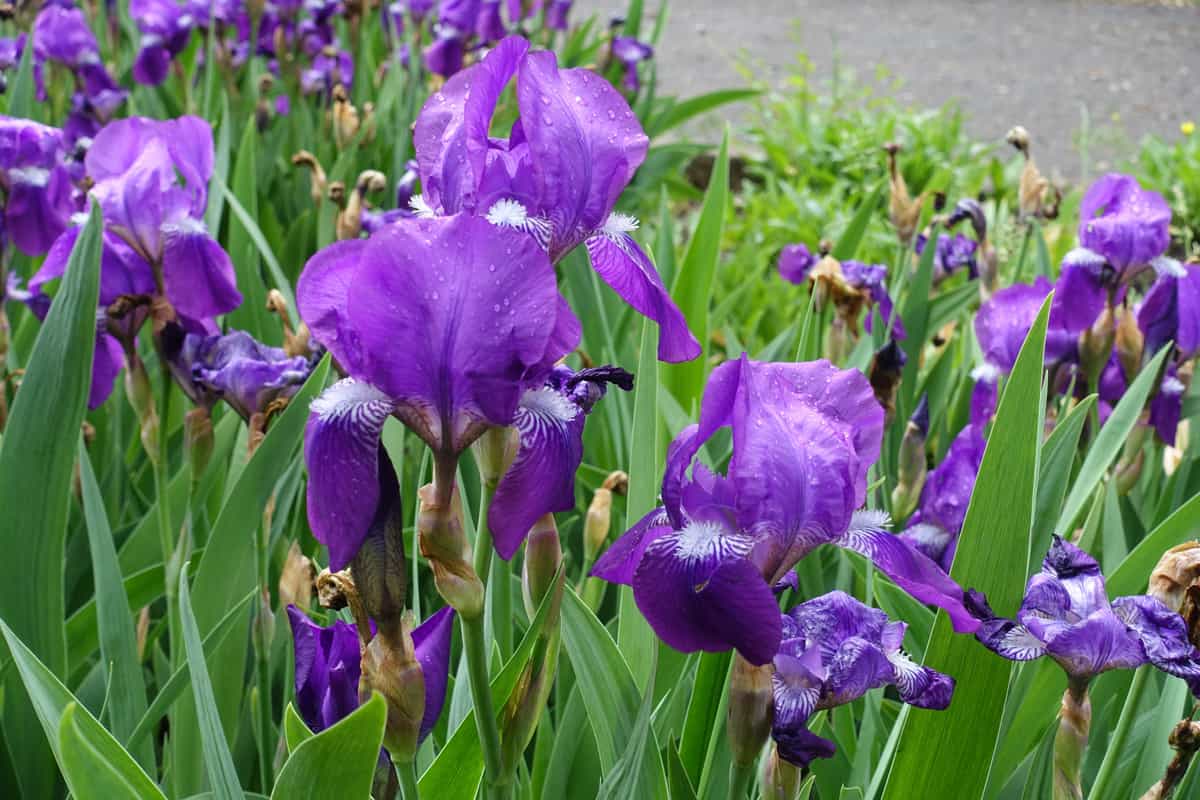
![Close view of purple flowers of Iris germanica with rain drops in May, How To Divide And Store Iris Rhizomes [For Planting Next Season]?](https://gardentabs.com/wp-content/uploads/2022/09/15.-How-To-Divide-And-Store-Iris-Rhizomes-For-Planting-Next-Season.jpg)
Storing :
In this article , we will expound on the aforementioned step . Also , we will share with you the planting subprogram . So , let ’s get quick to look at the gentle steps of select charge of iris rhizome .
How To Divide Iris Rhizomes?
More than300species of iris exist , and they are ofttimes separate into groups based on the various theme social organization they bring forth .
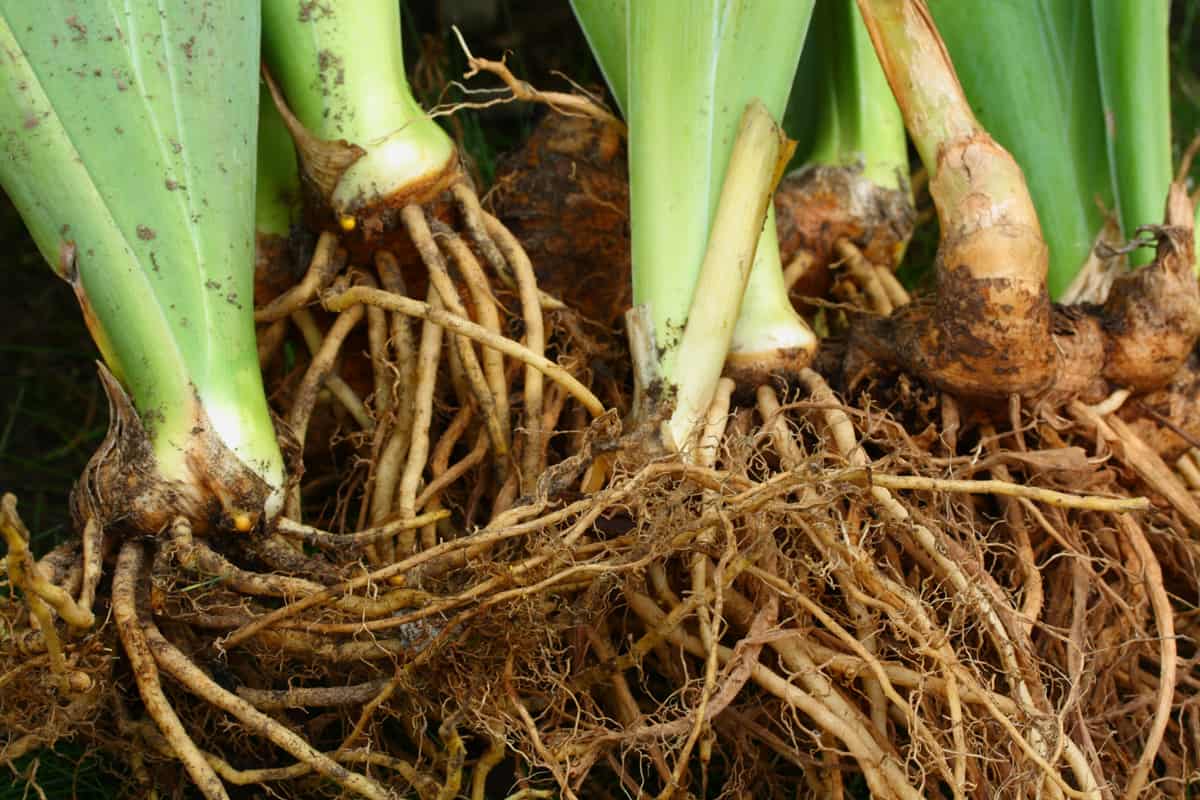
Some irises have unchewable root clumps whereas others have bellying roots . But the bearded iris group — the big and possibly the most pregnant — grow from fleshy , conceited ulterior structures called rhizomatous roots .
When a gardener buy a fresh iris , particularly from an online supplier , it frequently just comes as a rhizome segment that needs to be planted and often with a cut incision of leaf still seize .
1. Dig Out The Clump Of The Plant
drudge up the whole iris diaphragm bundle with a garden spadeful . Making deep cold shoulder all the style around the clustering and then take out it from the priming with a shovel is the simple way to accomplish this .
cluck here to see this shovel on Amazon .
Another tool to use is a garden forking . Place the fork 3 ” to 4 ” outside of the seeable rhizomes or only into the soil along the drip dividing line . Around the entire arena , loosen the territory . If you’re able to , take away the whole volume .
dawn here to see this garden fork on Amazon .
2. Clean The Rhizomes & Roots
While being careful to preserve the roots , brush the rhizomes and roots as thoroughly as you may using a soft bristle brushing . cleansing makes it simpler to carve up and front for potential pests .
3. Remove The Parts Without Leaves & Roots
Trim and remove any large portions , especially the center of bunch , that do n’t have a connected leaf fan . Discard the older ends of rhizome as well , which are the final stage farthest from the folio rooter and no longer exhibit alive root growth .
4. Remove The Unhealthy Section(s) Of The Rhizomes
Carefully examine the remaining rhizomes . Throw by those that are dusty , powdery , subdued , odorous , or show symptoms of borers . Borers are insects that bore holes the size of a pencil lead on the upper airfoil of the rhizomes of tall bearded types . If infected , leafage fans may also seem to be sluggish .
5. Divide The Rhizomes Into Sections
tailor rhizomes into portion that are 4 ” to 8 ” long and have at least one complete devotee using clean scissors or a tongue . Keep the roots in position .
Click here to see this garden knife on Amazon .
As long as the part of the overweight rhizome has at least some leaf and a few root hang up from it , even very minuscule sections can successfully develop and bloom . From a unmarried clump of iris , you’re able to turn dozens of distinct plants .

6. Trim The Leaves
cut back the leaves on each division to a distance of 4 ” to 6 ” column inch using a twain of sharp pruners . The distinctive procedure is to trim the leaves on each raw section into an inverted V - shape fan .
This enable plants to maneuver their energy into developing strong roots rather than supporting a dense canopy of leafage . Trimming the fan prevent wind rock because a full fan can get more tip and dislodge rhizomes before the roots have a fortune to take hold .
How To Store Iris Rhizomes?
Storing the bulbs can be a intriguing procedure , but with enough practice , you could easily pick it up . The key is to watch out for them so that they do n’t dry out out or rot . If you strictly hold fast to the declared belowprocedure , you could keep your bulbs indoors safely .
1. Dry The Rhizomes
set them out to dry for a few days or until they feel dry to the touch in a individual layer in a protected , gay orbit . For even drying , flick them over .
Before starting the bring around process , the rhizomes must be totally juiceless . perverse to what pass off when artificial heating is used , drying them in the Sunday preclude significant harm . If it ’s not cheery when you ’re keep them , you should put them near a window and let them dry there for three to four sidereal day .
2. Clean Up The Remaining Dirt
Once they ’re teetotal , apply a delicate - bristled brushing to remove any remaining debris , but avoid washing them in water supply because doing so would require a longer curing menses .
3. Cure The Rhizomes
rhizome must cure before going into store after being dried and clean . Spread them out with at least an column inch between each piece on a flat control surface , such as a tray or a sizeable part of cardboard . If a 2d layer is required , place it on top of the first and plow it with newspaper or slenderly crease theme pocketbook .
Place in a room that is dark , dry , fond , and well - vent . The optimal temperature for curing is between 65 ° F and 70 ° F . To prevent illness , contagion , and rot , cure for two hebdomad .
4. Coat The Rhizomes With Antifungal Powder
After the rhizomes have finished cure , you should dust them with sulfur or antifungal powder . They wo n’t crumble because of this . When handling chemical substance powders , keep in thinker to endure gloves and to do work in a well - air out space .
Click here to see this fungicidal powder on Amazon .
5. Wrap & Put The Plant In The Container
In a individual stratum of newspaper , wrap each electric-light bulb separately . Put each works in a loge for depot after separately wrap it in the newspaper . The box may be composed of cardboard , rattan , wickerwork , wire basketful , or another breathable material .
keep off plastic since it can promote rot and does n’t allow for for enough air flow . Lay down some paper that has been softly pucker before tote up more if a 2d layer is required .
6. Store The Container At A Cool Temperature
Put the container containing the iris bulbs in a cool , well - ventilate area . Place it in a position that is consistently between 40 ° atomic number 9 and 50 ° fluorine . Rhizomes can break at temperature below 35 ° F . Warmth above 50 ° F might extend to moisture going and dehydration .
7. Do Regular Check-Ups
Establish a twenty-four hours on your calendar , such as the first of the calendar month , for steady monthly medical exam to ensure your iris plant remain healthy .
project properly away any rhizomes that are soft , slushy , or stinky , together with the paper they were enwrap in , to keep the spreading of rot ( but not in the compost ) . Give them a final wellness check once you are about to constitute them .
How To Plant Iris Rhizomes?
When the planting season total , you may establish the irises again after they have been stored . Below are thestepsfor found them .
1. Pick A Location That Receives Direct Sunlight
Even though bearded irises can withstand some shade , plants will not bloom as profusely in the absence of direct sunlight . Consider their placement in the garden seam when planting shorter kind of iris . delay aside from areas where they will be shaded by other plant .
2. Prepare the Soil
Iris thrives on productive , well - draining , inert to slimly acidic soil . Irises could dilapidate if they spend the winter hock in moist soil , so take extra tutelage to insure the soil is well - drain .
To activate the soil , use a cultivator or garden fork to a depth of about 12 ” . compost the grease with 2 ” to 4 ” of soil is an optional procedure . This can help increase soil fertility while also help in improve the drainage of thick soils .
3. Dig Holes
Dig each hole on an individual basis to a depth of 4 ” and a breadth of 10 ” and make a small cumulation of soil in the bottom .
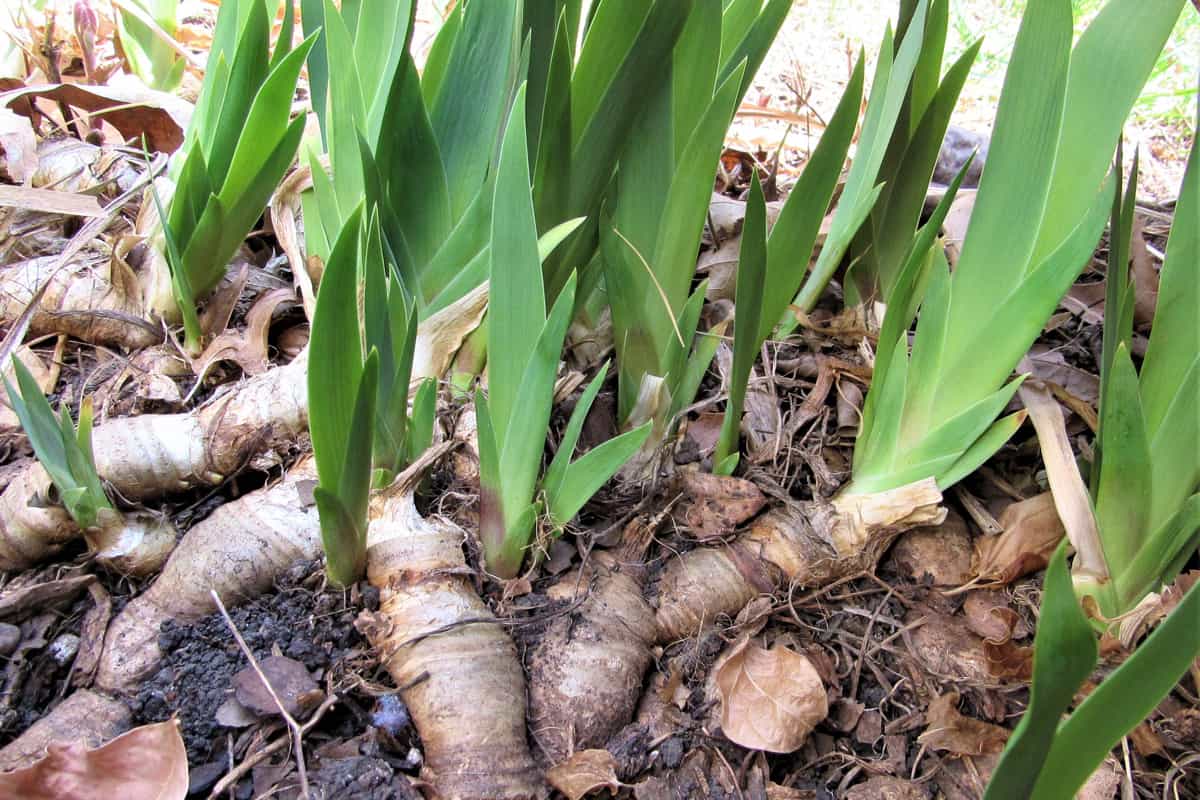
4. Plant The Rhizomes
It is idealistic to plant the rhizome pieces in groups of three or five , with the leaf rooter positioned so that they are all facing the same direction . For smaller type , provide at least 3 ” of blank space between each individual rootstalk . For magniloquent bearded types , leave up to24”spacing .
keep in mind how rapidly these plants develop , give way them plenty of space will give you several year before you require to dig up and divide them once more .
5. Backfill The Holes
satiate the golf hole with well - amended soil , and unwaveringly contract it down around the rhizome and leave . Do not mulch them because this can promote stem rot .
6. Water The Plant Generously
Water the newly imbed iris rhizomes . Also , water them for a few days until new growth becomes visible . After which they need hebdomadal tearing for the rest of the develop season . When it is evident that the newfangled rhizome is well - established , pop out to reduce the watering because you do n’t want the root to become saturated in piddle .
Conclusion
When propagating iris plants , it is the rootstock that are commonly dig out up , separate , stored , and planted . So if you need to cultivate this adorable works for the next season , determine how to divide , store and plant iris rhizome by rights are essential . With the usher above , you will never go awry .
Before leaving , check out more interesting topics below .
Best Knife For Dividing works

When To burn Back And Divide Liriope ?