You ’ve get your lawn looking gorgeous and green . bloom bed are dissipate attractively throughout the yard . It just needs one thing and it ’ll be perfect . Garden edging to the saving !
Garden butt against is a nifty dick that clearly defines the boundaries between lawn and bed . It ready everything look neat and polished . However , it comes in quite a few option that you ’ll have to decide between . One of the most low-priced options usable is plastic edging .
Even once you ’ve make up one’s mind on credit card as your material of option , you ’ll still need to choose one specific aspect . That ’s where we come in . Keep read to get all the information you need about fictile garden edging .
Different Types of Plastic Garden Edging
When make up one’s mind on a plastic edging type , it can be hard to order from the first glance what each kind is all about . Is it prosperous to install ? Can it curve around edge ? How do you make it bide in place ?
No worry . We did some research and gathered info on the six dissimilar types of plastic garden edging just for you .
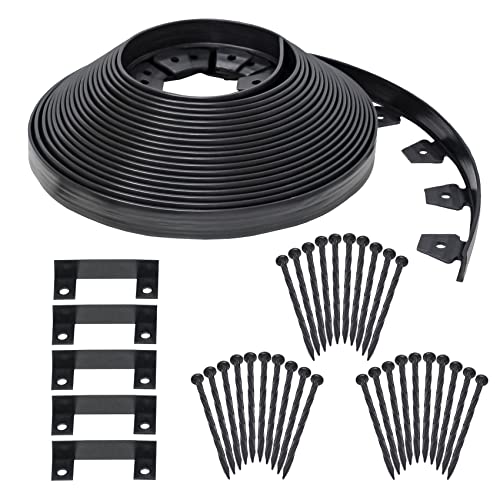
No-Dig Edging
No - dig garden edging is a great choice . It ’s quick and easy to install in just about any outer space . It well works around even the curviest of spaces due to its super flexible build .
This option will only last a few years , however , and can devolve victim to your lawnmower if you are n’t aware when installing it .
To find the no - dig edge above on Amazon come home here .

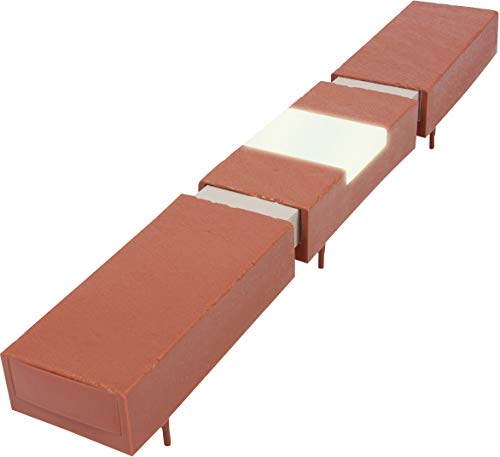
Decorative Plastic Brick
If you want something with a footling more spark than plain black edging , check this out . This choice looks like brick pavers lined around your garden . Some brands even have solar - powered lights set up between each brick .
This brick is a chip more durable , depending on the stigma you buy and are fairly well-fixed to install . However , they can be challenge to maneuver around curves , so keep this in mind before do a purchase .
To find the brick edging above on Amazon click here .
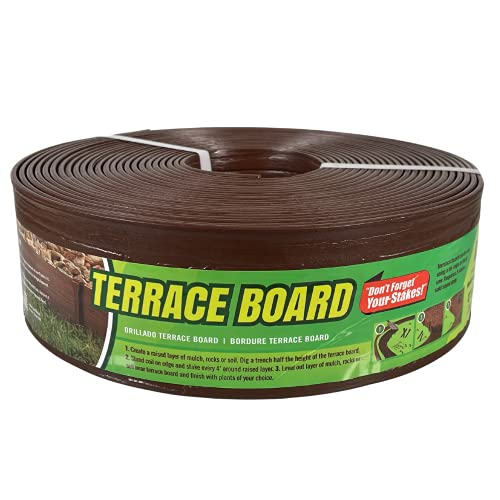
Terrace Board
Terrace board stands out among garden edging option with its wood - like appearance . Beyond the cool face of this edging , it also is majuscule for keeping weed from growing up along the edge of your garden .
However , its appearance can be compromised if not installed correctly . Extreme temperature may cause the terrace control panel to garble , leading to a wobbly appearance if proper installation measures are n’t taken into account .
pay attention during installationwill go a long way to making sure your bench board stays looking good .

To find this terrace plank on Amazon click here .
Black Plastic Edging
This is a top-notch inexpensive option for your landscape gardening needs . It ’s evenhandedly soft to instal and works great in both sharp corners and curves .
You do have to be careful when instal it , though . If not done correctly , you’re able to create some somewhat serious drainage problems , though .
Dig deep , dig smooth , and pay attention to those instructions for a simple yet pretty edge .
To feel this edging on Amazon snap here .
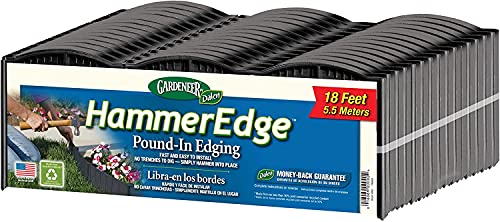
Interlocking Poundable Plastic Edging
The initiation for this edging is super simple . come out the section where you desire it , lumber it into the ground , lock in the next incision , rinsing and repetition .
You may want to wet down the stain so it ’s a second softer for installment , but that ’s as firmly as it gets . The interlocking aspect of this make water it a great choice for both unbowed and curved plan .
To find the interlocking edge above on Amazon click here .

Decorative Plastic Fence Edging
The fencing material option is a outstanding way to tally some charm to your gardens . It comes with plastic or metal interest for installation .
A proficient idea for making installing a piece easier is to fall apart up your grime with a mitt trowel so that your stake go in swimmingly .
This sticks up a bit from the land , too , so making certain there ’s a edge of filth between the fence and grass will keep it from that lawnmower .

To find this fencing edging on Amazon snap here .
Pros and Cons of Using Plastic Edging
We know what you ’re thinking : Is it worth it ? How does it hold up up ? Here are all the proficient ( and bad ) features of plastic garden edging .
Pros
Cons
How Much Does Plastic Edging Cost?
shaping edging is well the most affordable edging on the market . We obtain it tends to average at around $ 2 - 5 per 50 foot of edge .
If you want facility done for you , you ’ll impart another $ 50 - 60 per 50 feet . Plastic edging can be hard to place correctly , so deal carefully if you desire to make unnecessary some hard cash by doing it yourself or if it would be deserving it to rent the instalment out .
How Do You Install Plastic Edging?
shaping edging that ’s set up without dig , like no - dig or the bricks , comes with stakes to keep it firm in situation .
Edging that needs excavation can be a routine trickier . Here ’s a tone - by - step guidebook to help you instal your edging absolutely every metre .
1. Measure
A large step is to quantify the out bound of your garden bed . This tolerate you to be totally sure you have plenty of butt against without have to make multiple trip-up to the store .
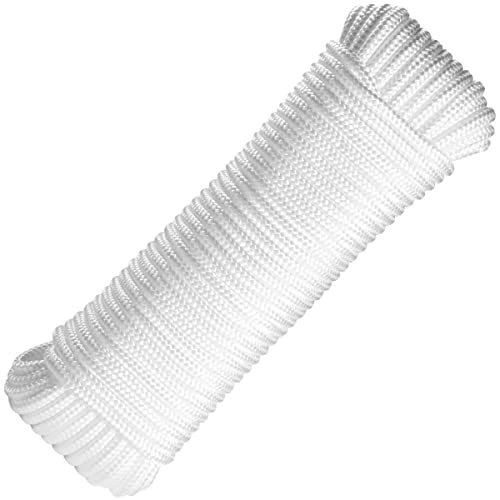
One of the comfortable way to do this is to begin with a rope . Place the rope just where you require your edging . Once you have it outline you could measure the rope you used to observe out how much you need to buy .
To find this rope on Amazon click here .

2. Unroll Your Plastic Edging
Plastic edging that ’s rolled up will want to stay revolve up . A good way to ready that is to unwind it and allow it rest .
Let it pose for a day or so in the sun . The sun warm up the charge card which allows it to relax so it ’ll be easier to manipulate .
Otherwise , you ’ll be out there wriggle with it and break-dance your back . Even though it sets you back a whole day , trust us . This is n’t a footstep to skip .
3. Dig a Trench
While your plastic edging is rest , snaffle that trowel and go grind . You want a unspoilt deep that ’s 3 - 6 column inch recondite , a morsel wider than your edging , and fairly level .
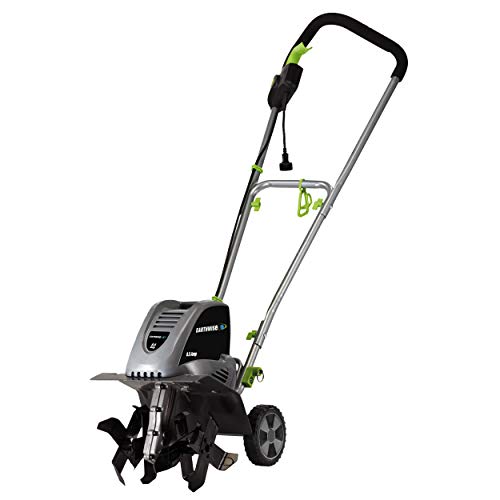
you could do this by hired hand with enunciate trowel or if you ’re lucky enough to own a tiller , take advantage of it and apply that .
Do n’t toss the soil you dig out . fix it apart tight by , you ’ll be using it later .

Pro - Tip : Before you clean up your rope in footfall 1 , go ahead and dig a jumpy trench so you screw exactly where you want it . Then cull the R-2 up and measure . This will save you a flake of a headache later .
To find this trowel on Amazon , click here .
To bump this rototiller on Amazon click here .

4. Cut off Roots
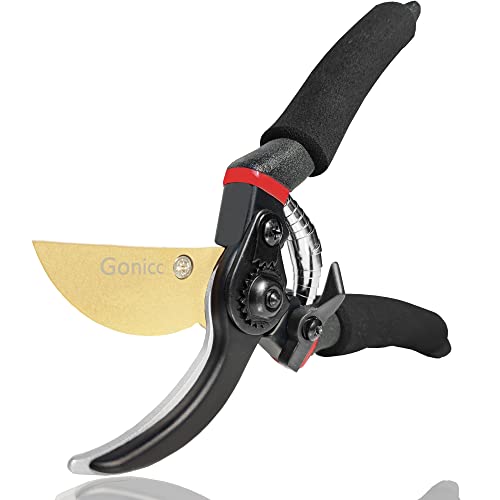
If you have mature plants in your garden it ’s likely you ’ll have ascendent that are stretch out out into your oceanic abyss . practice a pair of shears to cut them so they wo n’t be pushing against your edging .
If the roots are large , like from a tree diagram , cut a notch in your edging to reserve them to grow through it .
Do n’t cut your edging more than you utterly have to , though . This can make your edging less sturdy and allow for drainage issues to train .

To find these shears on Amazon sink in here .
5. Place Edging in Trench
Take your edging and come in it in the trench . The top of your edging should be at the open level of the lawn . This will keep it under the sword on your lawnmower as well as allowing for it to move up a bit as the territory under and around it settles .
Make certain you advertise the edging against the bed and place the back talk of the edging on the bottom of the oceanic abyss face up towards the garden bed . This will keep water from collecting and pressing the edging into the bed .
6. Connect Rolls
If you ’re having to use more than one roll of butt against you ’ll necessitate to use some connectors . A connection will slide onto the final stage of each roll . Push the curlicue ending towards each other so they meet in the centre of the connecter .
Once the end are in position , press down on the connection to verify it ’s well connected to the two large pieces .
To find these connectors on Amazon click here .
7. Fill in With Soil
That surplus soil we say to flow on to back in whole step 3 ? Now ’s the time to use it . utilize the land to meet in around the edging in the deep . Pack it in as tightly as potential . leave alone 1/2 - 1/3 inch of the top of your edging visible .
8. Compact Soil
You want that soil tamp down in there skilful to keep the edging from wiggle around too much . you could check on the top of the soil on either side of the edging to do this , or you could use a tamper to get the job done .
To discover this tamp on Amazon click here .
9. Install Stakes
establish stakes along the edging , every 5 or so feet , will aid keep the edging in place long - terminus .
You want to place the summit of the stake right next to the top of the edging with the pointed closing pointing down . cock the bet down with a mallet or hammering .
To witness this beetle on Amazon sink in here .

To detect this hammer on Amazon chatter here .
10. Fill In Gaps
Once you have your stakes in , take the air the perimeter of your garden bottom and forked - retard your edging . If you see any gaps , take them in by script and pack the extra soil tightly around the edging .
Wiggle the edging to insure for country that shimmy and add extra territory or even a stake in areas that are n’t secure .
Installation Video
If you ’d rather see some edging being instal , or if you find it would facilitate you fully understand the step , we find oneself a helpful video recording for you to watch .
Photo Gallery
If you still ca n’t decide on just what you desire for your garden , check out these depiction for some extra breathing in as well as a few examples of installations .
Black Plastic Install
This picture is show some black plastic edging being installed . As you could see , the gardener is send it in a pre - dug trench at the boundary of the seam .
The soil next to it is till and loose and ready to refill the trench once the edging is in property .
Interlocking Garden Edging
The butt being used here is the interlocking poundable plastic edging . If you front at the edge of the section being installed you could see the tab that ’s used to aid lock piece together .
The installed pieces to the left hand of the picture resemble stone slabs , a great example of how plastic edging can help you get a luxurious look for less .
Reuse and Recycle
This picture show shows a plastic garden edging option we did n’t traverse above- recycled edging . These soda water bottle were paint black and likely meet with gravel or George Sand to weigh them down .
It ’s also likely they were paste or attached to one another in a dissimilar way to keep them from separating . This eco - well-disposed edging create a bold melody that clearly delineate the garden blank space from the pace .
Waves and Curves
This picture is a great illustration of the flexibility of black plastic edging . The curves for this bed are neatly lined by the edging without any gap or twitch attend places .
This also show a great exercise of how your trench should attend when you finish placing your edging but before you add soil back to it .
Smaller Sections, Greater Flexibility
This is another instance of some interlocking edging . you’re able to see the locks on either side of the section .
One side has a hollow , open subway system while the other has a rotary lip that fits inside the pipe . The smaller section of this brand helper increase the flexibility of this type of edging , something to consider if you have a busty garden aim .
Colorful and Eco-Friendly
This is another deterrent example of some recycle edging . The different coloured washing soda bottles are buried along the outer perimeter of the bed to make an oculus - catching raised mete .
Be deliberate with this conception , though . Something that stand this far above the surface of the lawn will be at peril of getting damage from a lawnmower or sess eater .
All About Edging
If you choose to use charge plate edging , this post has all the info on types , pros and confidence trick , price , and installation that you need . While it can be hard to take just one , we ’re confident that whatever tickles your fantasy will look beautiful in your garden .
We ’re also sure-footed that your edging will be just as easy on your pocketbook as it is on your eyes . For a quick and cheap selection , shaping edging ca n’t be beat out .


![Plastic Garden Edging [How-to, Prices & Pictures]](https://gardentabs.com/wp-content/uploads/2019/11/Plastic-Garden-Edging-How-to-Prices-Pictures-683x1024.jpg)
