Ever try out dress your pet come up bush only to retrieve your shears are as softened as a rainy mean solar day ? You ’re not alone . Dull garden shear can turn a unsubdivided task into a thwarting chore , leaving your plants with ragged cuts that do more harm than well . But here ’s the in effect tidings : hold open your shear crisp does n’t have to be a mystery .
Imagine slice through branch with simpleness , make uninfected cuts that keep your plants sound and your garden looking its near . In this article , we ’re sharing 11 pro tips to focus your garden shear like a master gardener . Say goodbye to dull blades and hello to a thriving garden !
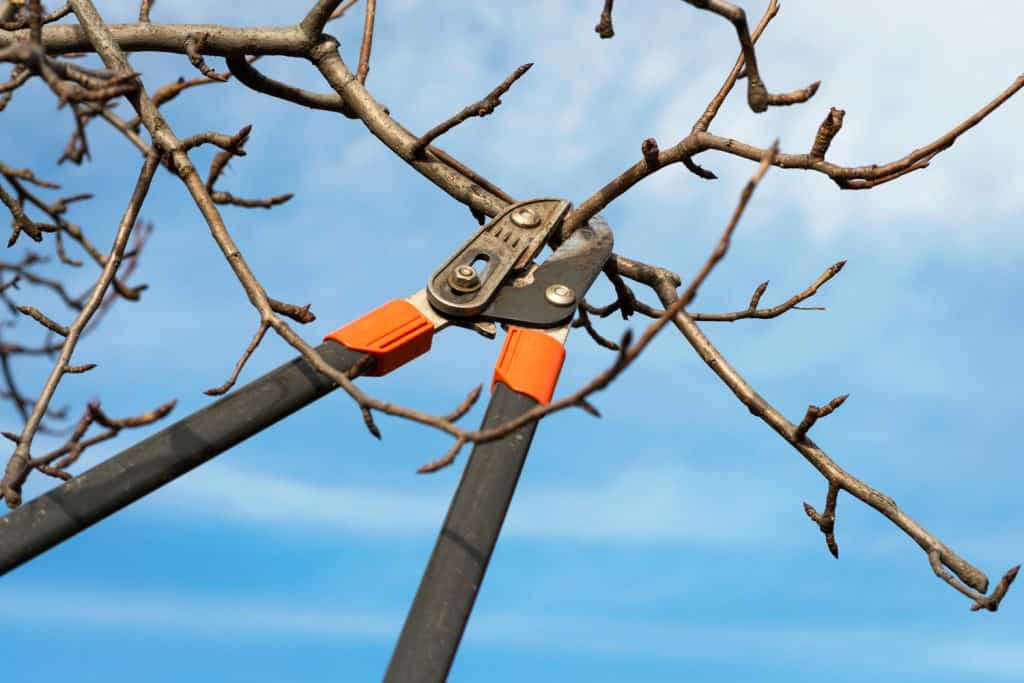
1. Know Your Shears
Before jump off into sharpening , it ’s significant to know the type of shear you have . Are they shunt or anvil shears ? shunt shears are like scissor hold , perfect for live branches . Anvil shears , with their straight vane closing onto a flat edge , are smashing for dead woods .
read your tools will make taper wanton and more effective . Plus , you ’ll impress your friends with your shear knowledge at the next garden golf-club meeting !
1a. Size and Brand
reckon the size and marque of your shear too . Some high - remainder brands might have specific focus guidelines . be intimate your shears well also means read the cloth of the blade , as stainless brand and carbon blade may require different care techniques .
1b. Shear Type
Different shear are design for specific chore . Bypass shears are perfect for live , immature stems and branches because they make uncontaminating cut that facilitate plants heal quickly . Anvil shears are well accommodate for ironical , stagnant Sir Henry Joseph Wood as their cutting action is more forceful . Hedge shears are ideal for trimming and forge hedges and bushes , while grass shear are design for accurate trimming of grass edges .
Using the veracious shear for each task ensures better termination and less wear on your tools .
2. Clean Before You Sharpen
It might seem obvious , but dirt and sap can make point a muggy mess . Give your shears a good scrubbing with oleaginous water , and for stubborn sap , a bit of rubbing alcoholic beverage works wonder . Dry them thoroughly to prevent rust fungus .
2a. Inspect for Rust
After clean , inspect the shears for any signs of rust fungus or damage . A minuscule rust pip can be handled with a bit of steel wool , but if the rusting is across-the-board , you might need to view professional restoration . Cleaning also gives you a opportunity to lube affect part , ensuring they sour swimmingly .
Use a stiff brush or an old soup-strainer to polish off dirt and debris from your shears . For awkward sap , a rag soaked in rubbing intoxicant can help unfreeze the residue . A small , bland blade screwdriver can be useful for scraping off caked - on dirt .
A bucket of unctuous piddle is dandy for an initial wash , while specialised cleaning sprays can provide a deeper clean . Keeping a little cleansing kit handy can make this task quick and easy .

Shutterstock
3. Choose the Right Sharpening Tool
Not all sharpener are created equal . For most garden shears , a sharpening rock or diamond file works wonder . If you ’re feeling fancy , a dedicated shear sharpener can make the problem even soft . Sharpening stones come in various grits ; start with a coarser sand to remove nicks and finish with a finer grit for a svelte edge . The correct tool have all the difference .
Explore the different types of focalise rock usable : oil stones , water gem , and rhomb stones . Each has its own pro and cons .
For example , oil color stones are long-wearing but mussy , H2O stones are tight - cutting but require soaking , and diamond stones are in force but can be expensive . know which instrument suits your shears best can enhance your sharpening experience .

Shutterstock
3a. Quality Materials
When select a taper tool , look for high - quality materials like lasting Stone and ball field - coated files . A good focalize stone should have a uniform gumption and be expectant enough to deal the distance of your shear blades . Diamond files should be well - coated and comfortable to hold .
commit in a reputable trade name can redeem you from foiling down the line . Read reviews and , if possible , essay the tool before buy to ensure it meets your need .
4. Secure Your Shears
Safety first , ethnic music ! expend a bench vise or clamp to hold your shears regular while you work . If you do n’t have one , a sturdy table and a bit of elbow dirt will do . keep your shears static prevents slip and chance event , ensuring you’re able to center on getting a perfect edge .
No one need a runaway shear incident — your fingers will give thanks you ! If you do n’t have a vise , consider using a piece of non - slip matting to hold the shear in position . This extra snatch of stability can make a huge difference . Additionally , wearing protective baseball mitt can provide an lend layer of safety .
Setting up your workspace correctly can make a big conflict . assure your working control surface is at a well-off height to prevent back strain . If you ’re using a bench vise , position it so you do n’t have to flex over awkwardly . Use anti - fatigue gym mat if you ’re standing for foresighted period .

Shutterstock
When hold the shear , keep your wrist straightforward and avert excessive force . Taking breaks and stretching can keep muscle fatigue and keep you comfortable while working .
5. Sharpen at the Correct Angle
Most garden shears have a beveled edge that should be sharpen at a 10 - 15 degree angle . Too steep , and you ’ll smash the boundary ; too shallow , and it wo n’t be effective . throw the sharpener at the right angle and asseverate it throughout each stroke . This might take a bit of pattern , but it ’s deserving it . Use a marker to color the boundary of the steel before you set forth sharpening . This visual aid helps you maintain the right angle and see your advance . There are also angle guide available that can attach to your point stone , ensuring eubstance .
Visual aids like angle guides can help oneself you keep the correct sharpening angle . These can be small devices that cut back onto your sharpening tool or print guide you may use as a reference .
Some ripe sharpening organisation derive with build - in angle guides . practice on an sometime blade can aid you get a feel for the ripe angle before working on your good shears .
Shutterstock
6. Use Smooth, Consistent Strokes
When sharpening , consistency is key . Use smooth , even strokes along the blade , follow the natural bender . Gentle and firm wins the race . Avoid pressing too intemperately ; low-cal , logical pressure is all you need . More pressure sensation does n’t mean better results ; it can actually damage the blade . enumerate your stroke to ascertain both side of meat of the blade are equally focus .
Typically , 5 - 10 strokes per side should suffice , but this can vary depending on the bluntness of the steel . keep data track help keep balance and foreclose over - point one side .
6a. Sharpening Methods
There are different methods to sharpen blades . A linear stroke imply proceed the sharpener along the blade in one steering , maintaining uniform air pressure . rotary motion can also be good , particularly for take out nicks . Another technique is to focus in a figure - eight pattern , which can provide an even border . experimentation with these methods to see which works best for your shear .
7. Flip and Repeat
Once you ’ve sharpened one side , flip your shear and repeat the process on the other blade . This insure both English are evenly sharp and ready to tackle your garden . It ’s all about balance — neglect one side , and you ’ll terminate up with a lopsided tool that ’s only one-half as effective . After flip the blade , it ’s a good idea to inspect the boundary again . await for any Aaron Burr or uneven spots that might call for extra attention .
Sometimes , a quick touch - up on the first side might be necessary after work on the second side .
For serrate blade , you ’ll need a tapered sharpen file cabinet to match into the grooves . focalize on each serration separately , maintaining the right angle and pressure level .

Shutterstock
For curved blades , comply the innate curved shape with your sharpener , ensure you cover the entire edge . For the best results , use a clean , soft textile for the final polish . Polishing not only ameliorate performance but also give your tools a professional look .
Some shears may have asymmetrical blades , need different slant or technique on each side . Understanding the specifics of your tool will help you accomplish the best results .
8. Check Your Progress
Every few strokes , ascertain the blade for asperity . You ’re looking for a clean , burr - free sharpness . A quick test is to see if the sword can slice through a piece of paper effortlessly . If your shears can do this , you ’re on the ripe track . If not , keep perish — perfection takes time .
Checking your progress keep over - sharpening and ensures you ’re move in the right direction . Besides the newspaper test , you may also essay the acuteness by gently running your pollex across the vane ( not along the border ! ) . A sharp blade should sense smooth and destitute of dent . If you feel any harsh smudge , those area ask a bit more workplace .
Keep a sharpening log to track when you last sharpened your shear and the techniques you used . remark any problem or adaption needed . carry before and after pic of the blades can also be utilitarian for optical reference .

Shutterstock
9. Polish the Blade
After sharpening , give the blade a immediate polish with some fine - gritstone sandpaper or a cloth . This not only removes any remain Burr but also makes your shears look glossy and new . polish smooths out any microscopic rough spot , giving you a cleaner cut .
Who does n’t love a bit of sparkle ? Your industrial plant will thank you for the clean cuts , and your shears will look brand new . Polishing compounds or metal polish can be used for an even finer finish . These products help to achieve a mirror - like shine , reducing friction during curve and enhancing the vane ’s performance .
okay - gumption emery paper ( 600 grit or higher ) can smoothen out any remain raspy spots . Polishing compound , available in various grits , can give your blade a mirror goal . A cloth wheel attached to a practice can make quick work of polishing larger blades .

Shutterstock
10. Oil for Protection
Once your shear are sharp and polished , apply a light coat of oil to the blade . This forbid rusting and observe them moving smoothly . employ a cloth to utilize a thin bed of petroleum , ensuring you cover the entire blade . While household oils like veggie crude can work in a mite , specialized cock oils or lubricating substance are designed to provide longer - lasting protection .
A well - oiled shear is a felicitous shear , ready to take on your garden with ease . It ’s like giving your car a invigorated coat of wax — protection and effulgence all in one . Regularly oiling your shears after use can prevent rust and keep them in top condition .
After oiling your shear , lay in them in a dry , coolheaded place to prevent rust . Use brand safety machine or sheath to protect the edge . hang shears by their handle can keep the blades from dull .

Shutterstock
11. Regular Maintenance
To keep your shears in crest - top conformation , make sharpening a regular part of your gardening routine . A quick touch - up every few week can save you time and effort in the long run . It ’s much light to maintain a astute sharpness than to reconstruct a slow one . unconstipated maintenance ensures your tools are always quick to perform at their best .
Create a care agenda and stick to it . After each use , take a import to clean house and inspect your shears . This proactive approach can get likely military issue early , extending the liveliness of your tools and make your gardening labor fluent .
Sometimes , despite your best effort , your shear may need professional attention . If the steel are significantly damaged or you ca n’t reach a astute boundary , a professional focalize service can reconstruct them to like - new condition .

Shutterstock
Keep Those Blades Sharp and Your Garden Happier!
And there you have it—11 pro tips to keep your garden shears as acute as your wag . With these tips in your gardening toolkit , you ’ll tackle every pruning task with ease , leaving your plants healthy and your garden looking like a million bucks . call up , regular criminal maintenance is key , and a little effort goes a long way in keep your shear in tip - top shape .
So , next clock time you ’re about to trim that rise up bush or undertake those rumbustious hedging , you ’ll do so with the confidence of a victor gardener .
Happy pruning , and may your garden be ever green and brilliant !

Shutterstock
delay out these article for more horticulture tool guide :
Top 10 Garden Tools You Ca n’t Live Without
10 Genius Ways To Clean And Store Garden Tools For Winter

Shutterstock

Shutterstock

Shutterstock

Shutterstock

Shutterstock

Shutterstock

Shutterstock

Shutterstock
